I’m often asked how all those Blu-ray discs on the shelf ended up on hard drives so that they can be used by Plex or Kodi. My short answer for this is rip with MakeMKV and compress with Handbrake.
Long answer
Before continuing, let me say that the whole reason I started doing this was so that I would no longer have to put a disc in my Blu-ray player to watch a movie. I was sick and tired of waiting for it to load, skipping over trailers, sitting through government warnings, and navigating menus just to get my movie going. I understand that the explosion of Netflix, Amazon, and other streaming services has largely solved this problem, but anyone who knows anything about a proper movie experience knows that the picture and sound quality on Blu-ray is unmatched when compared to that of streaming services. I buy Blu-rays because I care about that quality and want to preserve it when adding content to my library. That being said, let’s move on.
MakeMKV
First, we’ll start with getting the movie off the disc. This process is called ripping. We’ll be using MakeMKV to accomplish this. One thing to note about MakeMKV is that it is in beta (and has been for quite some time) and requires a registration code before it can be used. The code is updated every couple of months or so. A quick Google search will reveal this code, but I’ve linked it here. Once MakeMKV is installed, go to Help -> Register and paste in the code. Now we’re ready to rip.
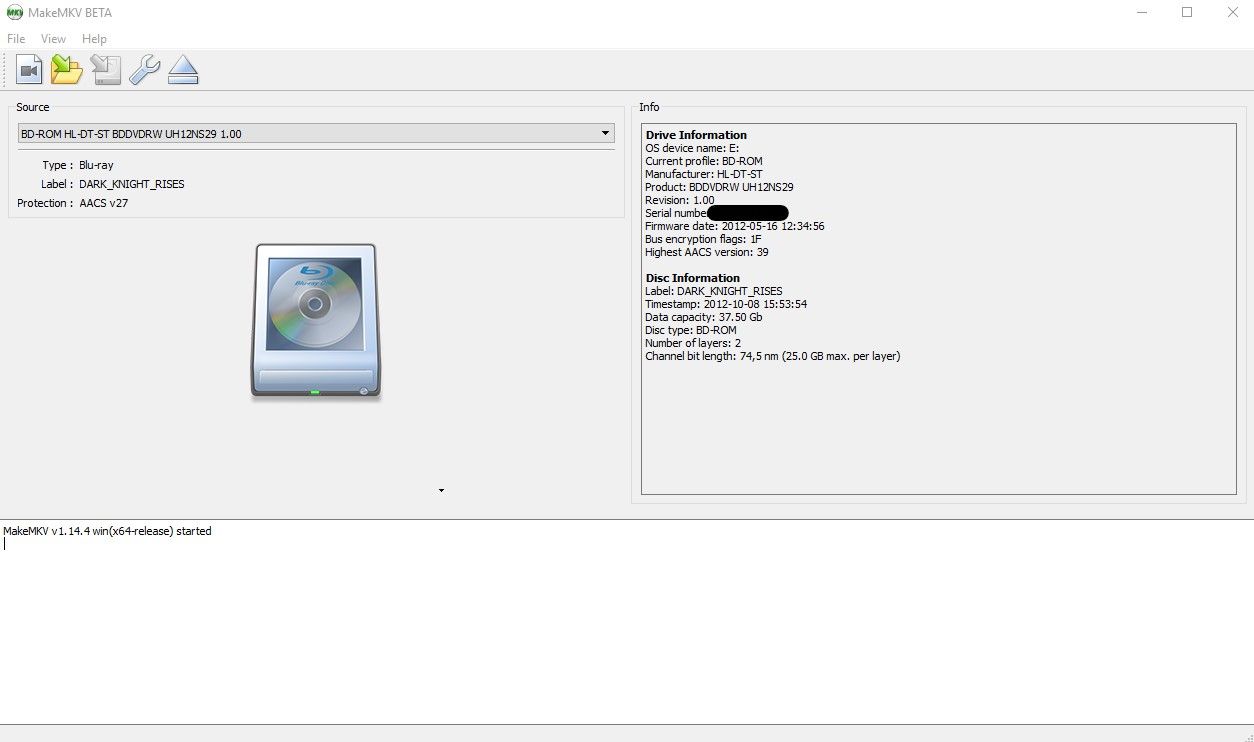
Step 1: Insert the disc into your Blu-ray drive and click the drive icon to start scanning it.
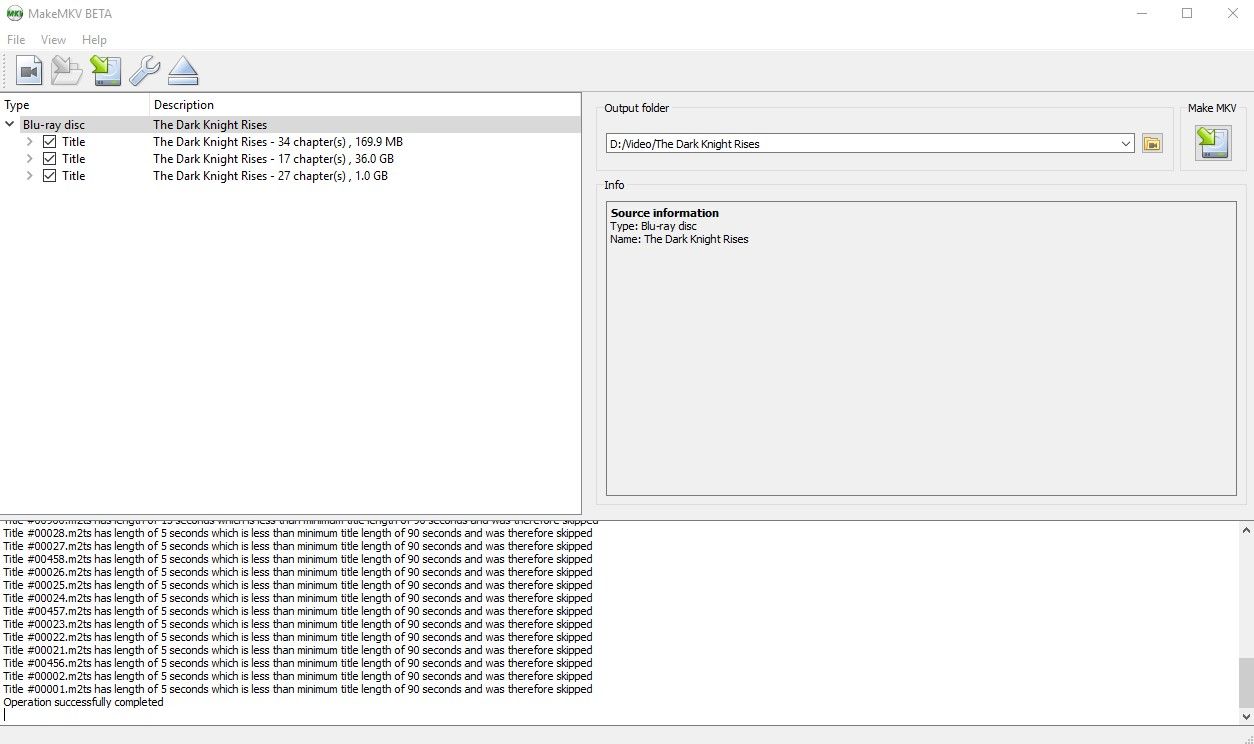
Step 2: Select the titles you want to rip. The movie is the title with the biggest file size. Each title that is selected will be saved as a separate mkv file. Note that I’m ignoring any title less than 90 seconds long. This helps sift out all the menus and previews that could be present on the disc.
Step 3: Select audio tracks and subtitles. You can select as many as you want here. Since I want to preserve the HD audio, I’m going to select DTS-HD MA track. If the movie has a director’s commentary track, I’ll usually select that as well.
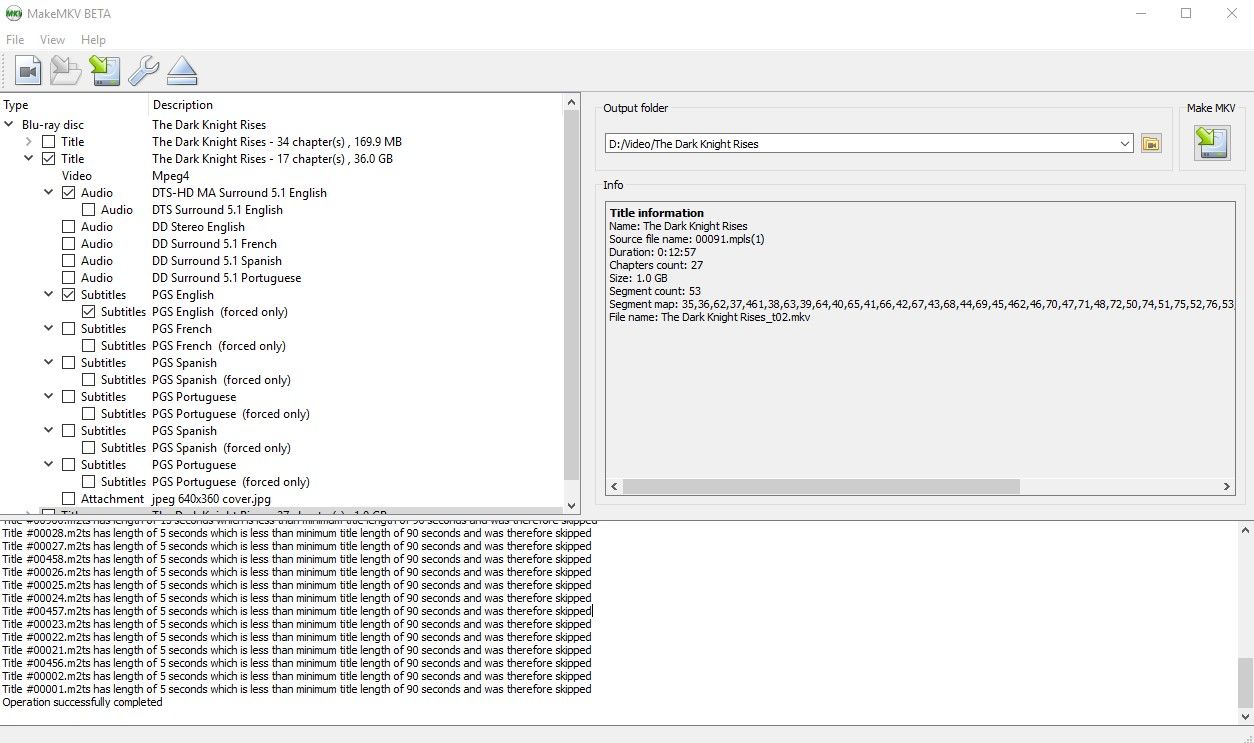
Step 4: Rip! Select an output folder and click the MakeMKV button on the right side of the window. This process will take around 20 minutes for most movies (at least on my Blu-ray drive it does).
Technically, you could stop here and load the file into Kodi or Plex, but compressing your rips is a good idea, so let’s move on to Handbrake.
Handbrake
Handbrake is an open source video encoder that can convert just about any kind of video format. Like MakeMKV, it will run on Windows, Mac, and Linux. It has a plethora of options for converting video files as well as built in presets for optimizing conversion for various devices. I created my own preset for compressing mkv files ripped from Blu-rays. I have tried many different variations of settings (some of which I couldn’t tell any difference between) and can say that with the settings below, no difference in visual quality can be seen between the compressed file and the original. I can’t say I know exactly what all the settings mean, but the Handbrake website has some great documentation that describes in great detail what all the settings do. The amount of time it takes to convert a video depends on your hardware, settings, and source file. Basically, the better the processor (threads and clock speed), the faster Handbrake can convert the file. A processor with more cores or threads will encode a file more quickly. My particular system has an AMD Ryzen 1700 overclocked to 3.8 Ghz which results in an encode time of 1-2 hours with the following settings.
Step 5: Open Handbrake and select a source file (this is the file that was just ripped with MakeMKV)
Step 6: Confirm output settings
I’ll be using H.264 at 1080p for this example. This is a safe format to go with since it supports good compression and nearly everything knows how to play it. H.265 provides even better compression, but the hardware that supports it is still somewhat limited, although the list is growing. The Amazon Fire TV stick has a hard time with H.265, but an nVidia shield or any of the newer Intel chips (Skylake and newer) support it. Plex, however, can transcode H.265 just fine, so if you run all your rips through Plex, you might as well try out H.265.
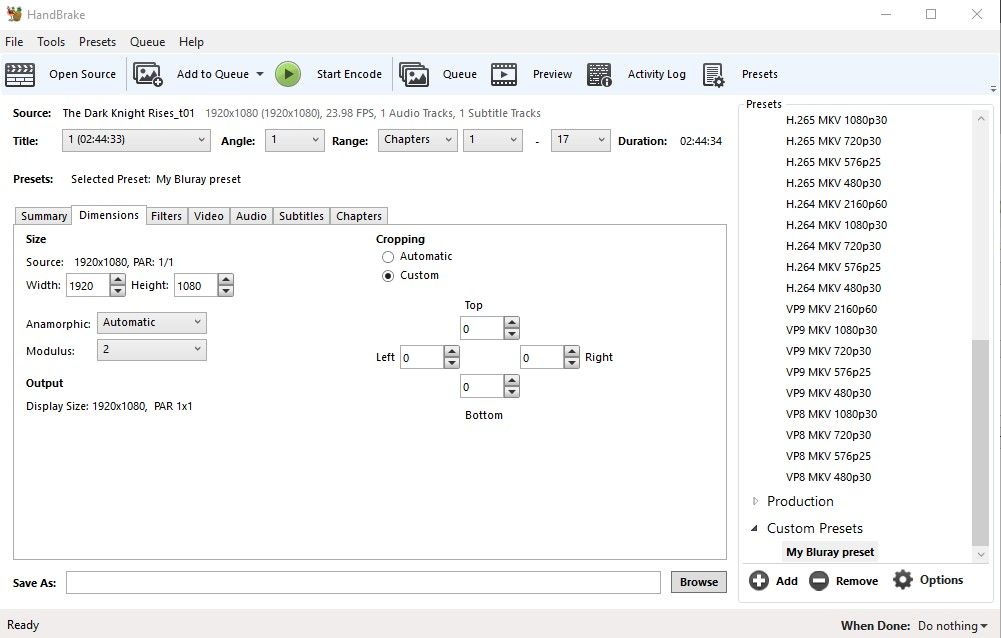
Dimensions – A note on cropping. Handbrake can automatically detect the black bars above and below movies and prevent those from being encoded. This results in a faster encode time and a smaller output file. Be wary of using this setting for movies that have changing aspect ratios throughout the film. Many of Christopher Nolan’s films have sequences that were shot with IMAX cameras which result in a 16:9 aspect ratio. If Handbrake crops the black space it detects at the beginning of the file, the top and bottom of the picture will be cut off during the IMAX sequences. If you want to turn this off, set Cropping to Custom and set all the values to 0.
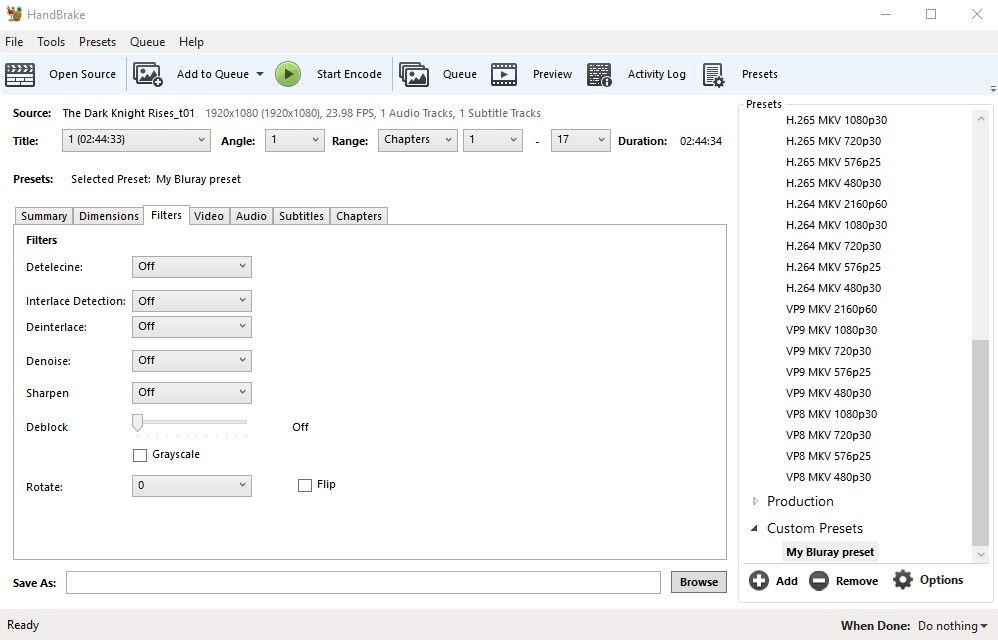
Filters – Turn everything off
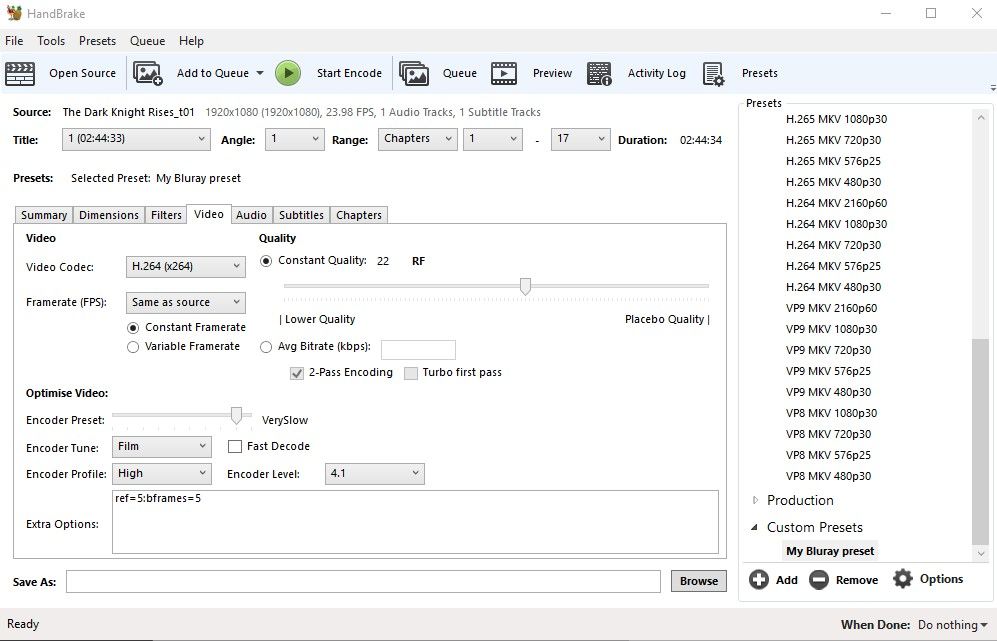
Video – The sliders for constant quality and encoder preset have a huge impact on the time it takes to convert a file. A lower RF number means higher quality. 20-24 is recommended for Blu-ray quality. I tried a bunch of different settings for the x264 preset and honestly couldn’t tell a difference among them all. Handbrake’s documentation describes medium as a good trade off between quality, output file size, and conversion speed for the Encoder Preset, but I’ve chosen to use VerySlow. I've also gotten excellent results using Slow. In the Framerate section, use same as source and constant framerate. Set the encoder tune to film, and the encoder profile to high. Under extra options, enter ref=5:bframes=5. If you experience color banding in dark scenes you can add qcomp=1.
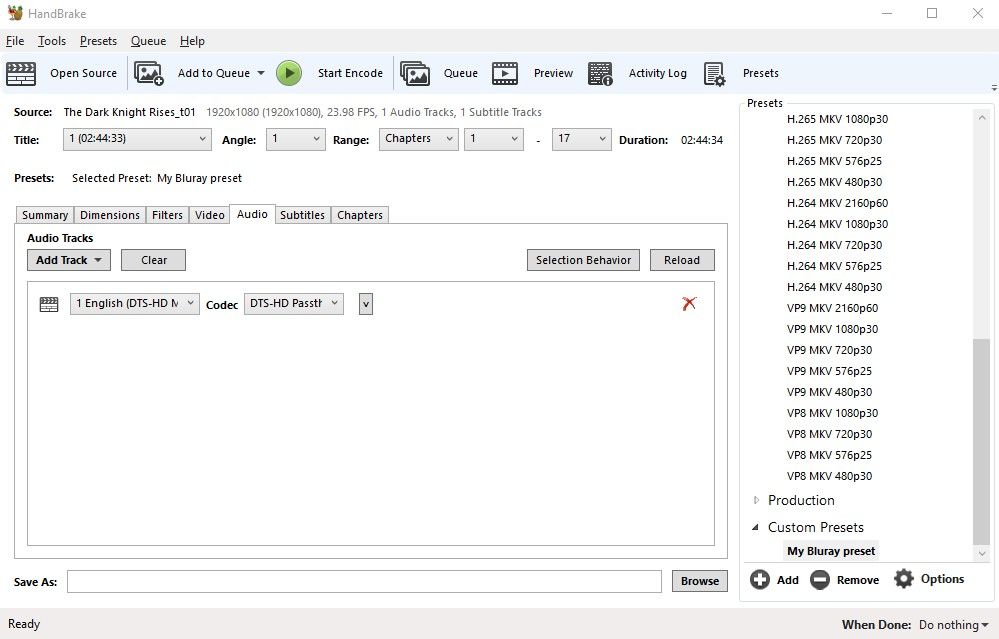
Audio – Handbrake has the ability to pass HD audio through the encode process leaving it untouched in the output file. In this case, I want to preserve the HD audio but compress the video so I’ll select DTS-HD Passthru in the codec dropdown menu since this file has a DTS-HD audio track. If you ripped out more than one audio track in MakeMKV, you can add them here so that they end up in the compressed file. If you’re not interested in preserving the HD audio, AC3 or MP3 are safe choices.
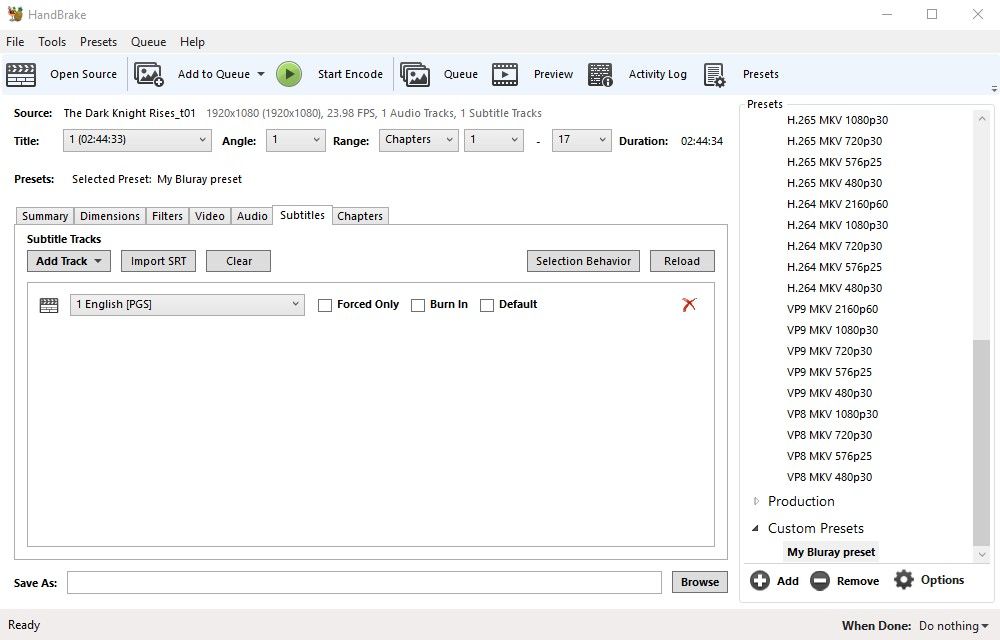
Subtitles – If the movie being converted has foreign language subtitles, you can select “Forced Only” and burn them in so that they appear automatically when playing the movie. Sometimes, this isn’t necessary because certain movies show the foreign language subtitles no matter what. In the case of Star Wars The Force Awakens, the foreign language subtitles are already burned into the movie, so all that’s necessary there is adding the subtitle tracks. I’ll be honest, dealing with subtitles can be annoying and is probably the most painful part of this process. But if you don’t care about subtitles then no worries! Kodi has a feature that can download subtitles for just about anything, so even if they aren’t added to the compressed file, you can have Kodi add them for you.
Once you’re satisfied with all the settings, go ahead and click Start. With these settings, the file size of The Dark Knight Rises dropped from 32 GB to 8 GB and it is still 1080p and contains HD audio. Expect most Blu-rays with these settings to end up in the 10 GB ballpark. Some can end up around 20 GB, others around 5 GB. It just depends on the movie.
If anything, I hope that this helps make the process of creating a movie library seem less daunting and confusing. Yes, it takes some time and dedication, but in the end you’re one step closer to never having to use the Blu-ray player again.
*********************************UPDATE*********************************
I started using H.265 compression to help eliminate color banding that results from H.264 compression. The results are much better. Below are the settings I use for H.265 compression for HD and UHD. H.265 takes a lot longer than H.264. On an AMD Ryzen 3700X CPU I can expect an HD blu-ray to take around four hours and a UHD blu-ray to take 15-20 hours. The UHD settings are from default H.265 2160p preset with a couple of minor tweaks. I tried these settings on a UHD rip of The Martian without touching the audio (set it to passthrough). The file size went from 46G to 11G and it still looked fantastic.
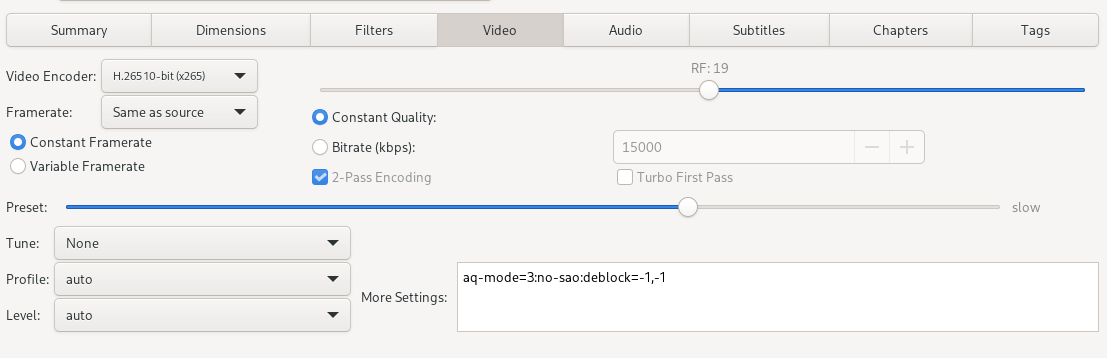
HD: Video tab (everything is still off in the filters tab)
More settings text: aq-mode=3:no-sao:deblock=-1,-1
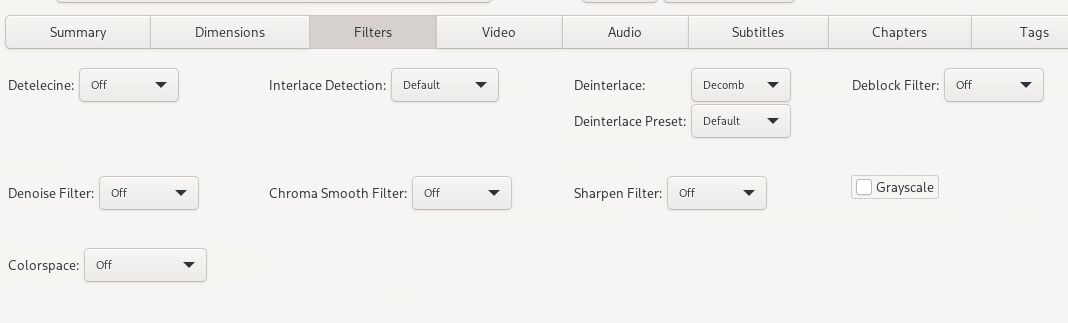
UHD: Filters tab
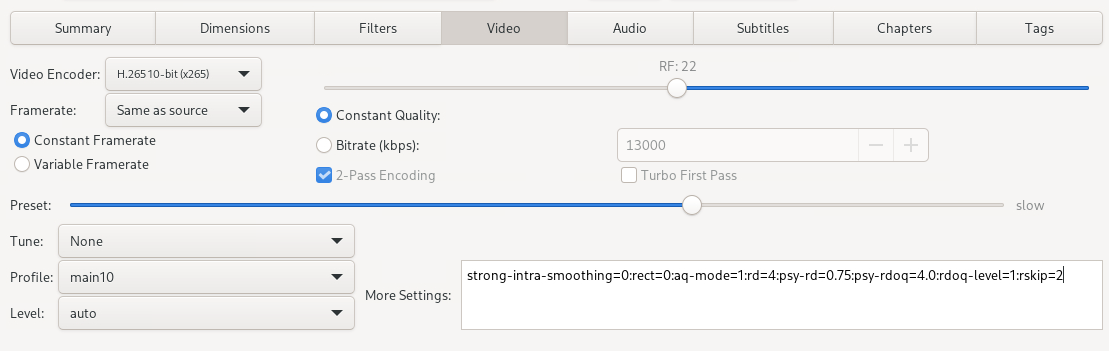
UHD: Video tab
More settings text: strong-intra-smoothing=0:rect=0:aq-mode=1:rd=4:psy-rd=0.75:psy-rdoq=4.0:rdoq-level=1:rskip=2